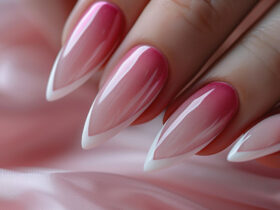
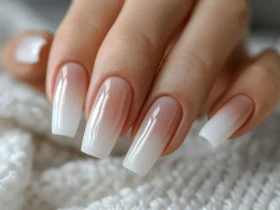
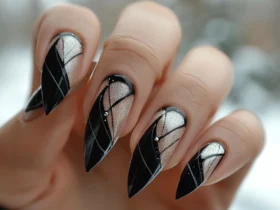
French tip nail art has long been a staple of elegance and sophistication. This timeless design, characterized by a clean white tip and a nude or pale pink base, offers a versatile look that can be worn on any occasion. But while the classic French manicure remains ever-popular, there are now countless ways to reinvent and personalize this look. In this article, we’ll explore various French tip nail art techniques, from the traditional method to more creative variations, so you can achieve salon-worthy nails in the comfort of your own home.
The Classic: A Timeless Technique
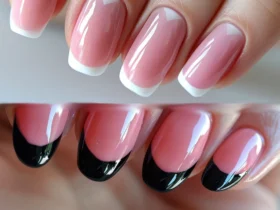
The classic French tip manicure is the epitome of understated elegance. This style involves painting the tips of your nails white while leaving the rest of the nail a natural shade of pink or nude. The result is a clean, sophisticated look that suits all nail lengths and shapes.
To achieve this classic look, follow these steps:
- Prep Your Nails: Start by shaping your nails to your desired length and shape. French tips work best with square or squoval nails, but they can be adapted to any style.
- Base Coat Application: Apply a clear base coat to protect your natural nails and help the polish adhere better.
- Base Color: Choose a nude or pale pink polish and apply one to two coats, depending on the opacity of the polish.
- Tip Application: Using a white polish, carefully paint the tips of your nails. You can use nail guides or stickers to ensure a clean line if you’re not confident in your freehand abilities.
- Top Coat: Finish with a glossy top coat to seal in your design and add shine.
Reverse French Tips: Flipping the Script
For those who love the French tip look but want something a little different, the reverse French tip is a chic alternative. Instead of highlighting the tips, this technique focuses on the base of the nail, near the cuticle.
To create reverse French tips:
- Base Color: Start by applying a bold or dark polish to your entire nail.
- Reverse Tip: Once the base color is dry, use a nude or contrasting color to paint a crescent shape near the cuticle.
- Top Coat: Seal the design with a top coat for a long-lasting finish.
French Tips with a Twist: Modern Variations
The beauty of French tip nail art lies in its versatility. While the classic style is perfect for formal events, you can easily switch things up with creative variations that express your personal style.
- Colored Tips: Instead of traditional white, opt for bold colors like red, black, or even neon hues for a modern twist.
- Gradient Tips: Achieve an ombre effect by blending two or more colors on the tips of your nails.
- Glitter Tips: Add some sparkle by applying a glitter polish to the tips or using loose glitter for a more dramatic effect.
- Metallic Tips: Use metallic polish for a futuristic look, or apply metallic nail foils to the tips for a high-shine finish.
- Graphic French Tips: Incorporate geometric shapes or lines into your French tips for an edgy, contemporary style.
French Tip Nail Art for Special Occasions
French tip nail art is also a favorite for special occasions like weddings, parties, or holidays. For these events, consider adding extra embellishments or using themed colors.
- Wedding French Tips: Add delicate lace designs, pearls, or rhinestones to your French tips for a bridal-ready manicure.
- Holiday French Tips: Use seasonal colors and patterns, like red and green for Christmas or pastels for Easter, to make your French tips festive.
- Party French Tips: For a night out, go bold with glitter, metallics, or even a matte finish paired with glossy tips.
DIY French Tip Nail Art: Tools and Tips
Creating French tip nail art at home is easier than you might think, especially with the right tools and a bit of practice.
- Nail Guides: These adhesive strips help you achieve perfect French tips without freehand painting.
- Dotting Tools: For more intricate designs, dotting tools allow you to add small dots or details to your French tips.
- Striping Brushes: These fine brushes are ideal for creating thin lines or geometric patterns on your nails.
- Practice Makes Perfect: Like any nail art technique, mastering French tips takes time. Don’t be discouraged if your first attempt isn’t perfect—keep practicing!
French tip nail art remains a classic choice for anyone looking to achieve a polished, elegant look. Whether you stick with the traditional style or experiment with modern variations, the possibilities are endless. With the techniques outlined in this guide, you can create stunning French tip nail designs at home that rival any salon manicure. So grab your polish and tools, and start experimenting with French tip nail art today!


